Evidence Summary
- Workflow run
crm-lead-create-delete-20260519T124223Z- Lead id
14- Description
AI Demo CRM Lead 20260519T124223Z- Imported records
1- Final state
- Deleted and absent from
DT_SelectLeads
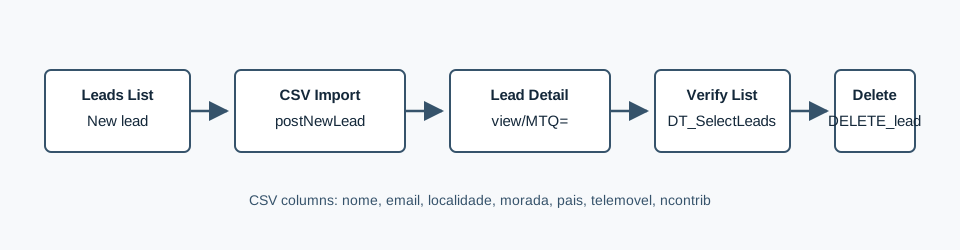
Create a Lead List
- Open
/crm/leads. - Click New lead.
- Enter a lead-list description.
- Upload a CSV file.
- Click Save.
The required CSV format follows the downloadable example: nome;email;localidade;morada;pais;telemovel;ncontrib. The verified import used a one-row CSV with name, email, Lisbon locality, address, country, mobile phone, and taxpayer number.
The verified save used multipart POST /ajaxserver with action=leads, option=postNewLead, description=AI Demo CRM Lead 20260519T124223Z, and file field file_import. The response returned {"success":true,"result":14}.
Verify the Import
After creation, OfficeGest opens /crm/leads/view/MTQ=. The verified detail page showed lead id 14, the imported description, status Active, and a lead-list table with one row containing the imported contact fields.
The lead list uses DT_SelectLeads with table=crm_leads, columns=id,description,active,records,created_at, and filter=1. The verified row returned records=1.
For changing the lead-list description or Active status after import, see How to Edit a CRM Lead List.
Delete a Lead List
- Return to
/crm/leads. - Click the delete icon on the lead-list row.
- Confirm the delete dialog.
The verified delete used POST /ajaxserver with action=leads, option=DELETE_lead, and id=14. The endpoint returned {"success":true,"msg":"Registration Successfully Deleted"}, and the final list lookup returned no matching row.
Artifacts
raw/playwright/workflows/crm-lead-create-delete-20260519T124223Z.jsonassets/screenshots/crm-lead-create-delete-20260519T124223Z-01-list-before-create.pngassets/screenshots/crm-lead-create-delete-20260519T124223Z-02-detail-after-create.pngassets/screenshots/crm-lead-create-delete-20260519T124223Z-03-list-after-delete.png