Evidence Summary
- Workflow run
crm-task-notes-20260519T100440Z- Updated task
431- Subject
AI Demo CRM Task 20260519T094141Z Reopened- Verified notes
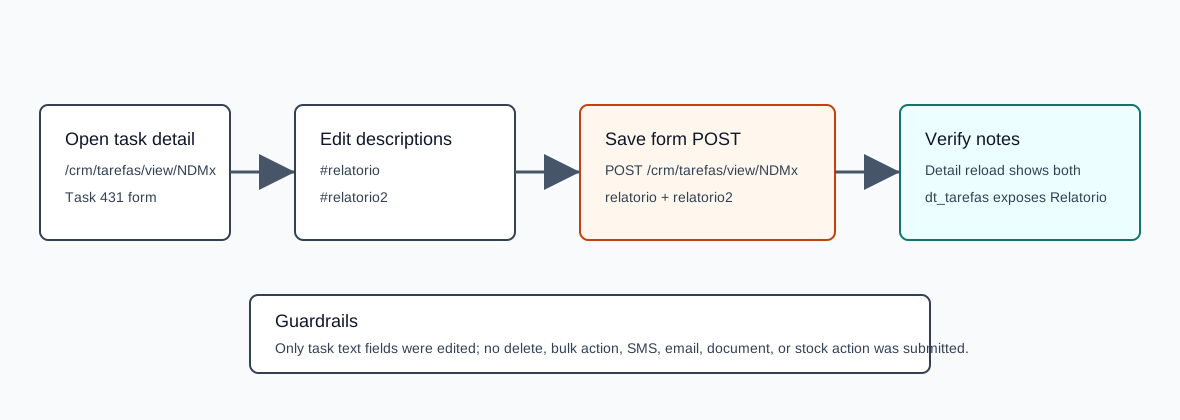
relatorioandrelatorio2saved from the task detail page
Before You Start
- Open CRM then Operations then Tasks, or navigate to
/crm/tarefas. - Search for the task and open its detail page.
- The note fields are in the cards Aditional Description (1) and Aditional Description (2).
Edit the Notes
- Open the task detail page.
- Scroll to Aditional Description (1) and enter the main task note.
- Scroll to Aditional Description (2) and enter the follow-up or secondary task note.
- Click Save.
- Reopen the task detail page and confirm both description editors show the saved text.
Verified Payload
The visible editors are contenteditable areas with ids relatorio and relatorio2. On Save, OfficeGest copies their HTML into hidden form fields with matching names before posting the task form.
| Field | Verified value | Meaning |
|---|---|---|
endpoint | POST /crm/tarefas/view/NDMx | Updates task 431. |
actualizartarefas | 1 | Signals task detail update. |
relatorio | <div>AI verified task note 20260519T100440Z</div> | Additional Description (1). |
relatorio2 | <div>AI verified follow-up note 20260519T100440Z</div> | Additional Description (2). |
assunto | AI Demo CRM Task 20260519T094141Z Reopened | Subject remained unchanged during the note run. |
perc_execution | 0 | Progress remained unchanged. |
codtipoev, prioridade, codempr | ToDo, N, 1 | Type, priority, and responsible employee were preserved. |
Confirm the Notes
- Open the task detail page again and check both description cards.
- Use the task list search when you only need to confirm the primary note. The list endpoint exposes
Relatorio, which maps to Additional Description (1).
The verified detail reload showed both saved HTML values. The verified dt_tarefas lookup returned one matching row for task 431 and exposed Relatorio=<div>AI verified task note 20260519T100440Z</div>.
Artifacts
raw/playwright/workflows/crm-task-notes-20260519T100440Z.jsonassets/screenshots/crm-task-notes-20260519T100440Z-01-task-detail-before-notes.pngassets/screenshots/crm-task-notes-20260519T100440Z-02-task-detail-notes-filled.pngassets/screenshots/crm-task-notes-20260519T100440Z-03-task-detail-after-save.png