Evidence Summary
- Workflow run
crm-appointment-entity-20260519T115412Z- Appointment id
434- Linked entity
C-910/100 Ouvidos Lda- Relation id
256- Link action
create_relcont_entity- Unlink action
delete_relcont_entity
Before You Start
- Open the appointment detail page from
/crm/marcacoes. - Open the entity area in the appointment detail surface.
- The Add Entity modal supports Customer, Supplier, Prospect, Commercial, and Collaborator entity types.
- Keep schedule notification, email notification, SMS notification, and notify-now controls unchecked unless you intentionally want notification side effects.
Link an Entity
- Click the entity add control.
- Choose the third-party type. The verified run used Customer.
- Select the entity. The verified run selected customer
910,100 Ouvidos Lda. - Optionally select contacts for the entity. The verified run linked only the entity and no contact rows.
- Click Save.
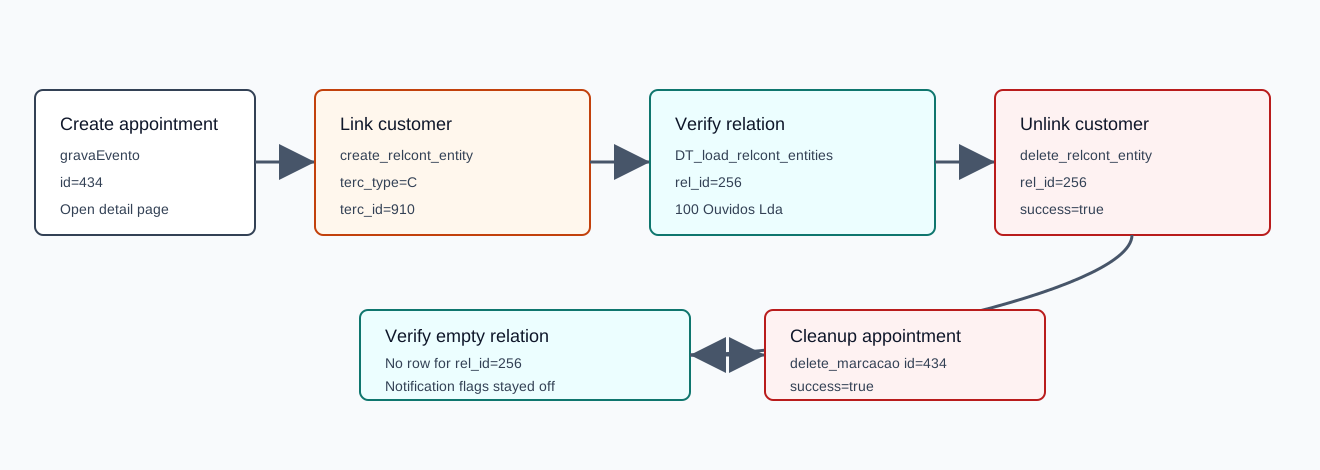
The verified request used action=create_relcont_entity, terc_type=C, terc_id=910, empty contacts_ids, all notification/send flags set to 0, and numrel=434. The response returned {"success":true,"id":256}.
Verify the Link
The appointment entity table is loaded by DT_load_relcont_entities with numrel=434. The verified row returned terc_id=910, rel_id=256, name=100 Ouvidos Lda, entity_type=C, notify_sms=0, notify_email=0, relcont_id=434, and no email or cellphone values.
Unlink an Entity
- Click the delete icon for the linked entity row.
- Confirm the delete prompt.
- Verify the entity row disappears from the appointment entity table.
The verified unlink request used action=delete_relcont_entity and rel_id=256. The response was {"success":true}, and the next DT_load_relcont_entities lookup returned no row for relation 256.
Artifacts
raw/playwright/workflows/crm-appointment-entity-20260519T115412Z.jsonassets/screenshots/crm-appointment-entity-20260519T115412Z-01-before-create.pngassets/screenshots/crm-appointment-entity-20260519T115412Z-02-before-entity-link.pngassets/screenshots/crm-appointment-entity-20260519T115412Z-03-after-entity-link.pngassets/screenshots/crm-appointment-entity-20260519T115412Z-04-after-entity-unlink.pngassets/screenshots/crm-appointment-entity-20260519T115412Z-05-after-delete.png
For contacts under the linked entity relation, see How to Link a Contact to a CRM Appointment Entity.