Evidence Summary
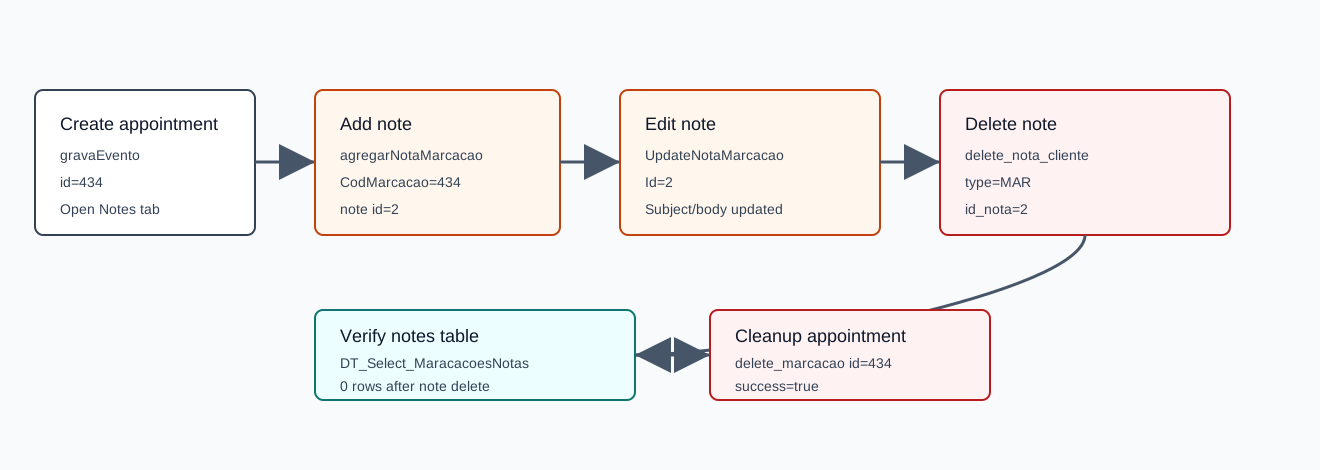
- Workflow run
crm-appointment-notes-20260519T114941Z- Appointment id
434- Note id
2- Add action
agregarNotaMarcacao- Edit action
UpdateNotaMarcacao- Delete action
delete_nota_clientewithtype=MAR
Before You Start
- Open the appointment detail page from
/crm/marcacoes. - Open the Notes tab. The notes table is loaded by
DT_Select_MaracacoesNotaswithsearch[CodMarcacao]set to the appointment id. - Use New Note to open the add-note modal, or the row edit/delete icons to change an existing note.
Add a Note
- Click New Note.
- Fill Subject and the note description editor.
- Leave Notify on sale unchecked unless the note must be flagged for sale notification.
- Click Save.
The verified request used action=agregarNotaMarcacao, CodMarcacao=434, Asunto=AI appointment note 20260519T114941Z, CodEmpr=1, Descricao=<p>AI verified appointment note body 20260519T114941Z</p>, and notificar_venda=0. The response was {"success":true}.
Edit a Note
- Click the note row edit icon.
- Update the subject and description.
- Click Save.
The verified edit used action=UpdateNotaMarcacao, Id=2, Asunto=AI appointment note edited 20260519T114941Z, Descricao=<p>AI verified edited appointment note body 20260519T114941Z</p>, and notificar_venda=0. The notes table then returned note 2 with the edited subject and body.
Delete a Note
- Click the note row delete icon.
- Confirm the delete prompt.
- Verify the note is no longer present in the Notes table.
The verified delete used action=delete_nota_cliente, type=MAR, and id_nota=2. The response was {"success":true}, and DT_Select_MaracacoesNotas returned no row for note 2.
Artifacts
raw/playwright/workflows/crm-appointment-notes-20260519T114941Z.jsonassets/screenshots/crm-appointment-notes-20260519T114941Z-01-before-create.pngassets/screenshots/crm-appointment-notes-20260519T114941Z-02-before-note.pngassets/screenshots/crm-appointment-notes-20260519T114941Z-03-after-add-note.pngassets/screenshots/crm-appointment-notes-20260519T114941Z-04-after-edit-note.pngassets/screenshots/crm-appointment-notes-20260519T114941Z-05-after-delete-note.png
For entity relationships on the same appointment detail page, see How to Link a CRM Appointment to an Entity.